


Cooking Up Experiments!: "Freezing the Freezables"
5:56 PM

*Catchy Theme music*
Hello everyone! Thank you for tuning in to Cooking Up Experiments! For our very first episode we are going to peek into my kitchen to see what I have been working on!
It was so much bigger than I realized! We didn't even get through all the buildings. I was able to score some great deals all for a little under $13!
-4 onions @ $2
-4 tomatoes @ $1
-2 avocados @ $1
-1lb of grapes @ $1
-13 apples (almost 6 pounds) @ $3.50
-1 lb of carrots @ $.65
-9 peppers @ 3 for $1. He even gave me the extra so I got 9 for $2!
I even was able to buy a whoopie pie from the fresh bakery for $1.50!
Now there's no way all of this would last for two weeks on its own. With just my husband and me we can't eat that much produce even when putting it in meals and salads before it would go bad. So I did some researching and have been for awhile wanting to attempt a food preservation project which I have dubbed, "Freezing the Freezables". :)
Yesterday I tried it!
I'm sure there are many blogs and articles out there how to do this, but for the sake of wanting to have record of how I did this when I have to do it all over again down the road, I wanted to blog my first time experience with this!
These are the yummy goodiness I picked up!

Where I got this tutorial is from good ole' faithful pinterest. :)
Pinterest is a great resource for which vegetables can be frozen.

So let's begin!
What you'll need:
-Freezable veggies
-A slice of bread
-Ziploc freezer bags or whatever freezer bags you can get that have a good seal
-Aluminum foil
-A sharp knife
-A cutting board
-A pot of boiling water
-Plenty of ice cubes
-A bowl or container of cold water
-An unstuffed freezer
-A slice of bread
-Ziploc freezer bags or whatever freezer bags you can get that have a good seal
-Aluminum foil
-A sharp knife
-A cutting board
-A pot of boiling water
-Plenty of ice cubes
-A bowl or container of cold water
-An unstuffed freezer
Having to do this out of my little apartment kitchen was somewhat of a challenge, but I managed to do all of these one after another. I also think freezer and freezable are fantastically fun words to say!

First I washed all the vegetables. They are locally grown, but I still don't want to take a chance with any pesticides. I then filled my biggest cooking pot with water and set the heat between medium and high to boil it.
While it was heating up to boil, I started with the peppers. I chopped them in half, cleaning out all the seeds and guts. Ewww guuuuuts!!!

Next, I chopped them into chunks. Some people prefer to dice them or cube them to be ready for soups and meals, but I preferred chunks so I would't have to use more bags than I needed to. I also wanted to use these for on salads.
 Once chopped, I checked my pot of water to make sure it was boiling. By this time it was! I carefully placed half of the peppers in the pot (there were 9, so a lot of chunks!) I set the timer for 3 min.
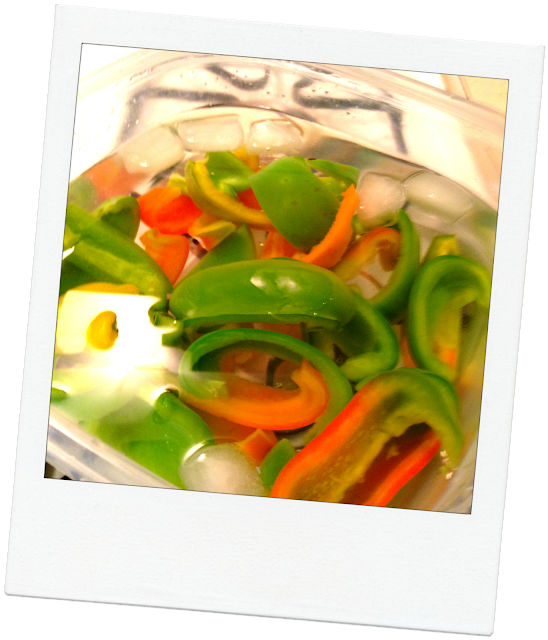
 After 3 min of ice shocking them, I poured them into a drainer and let them dry out the best I could. I then placed them on top of a baking sheet with aluminum foil or you could use wax paper. Both worked.


Next, I chopped them into chunks. Some people prefer to dice them or cube them to be ready for soups and meals, but I preferred chunks so I would't have to use more bags than I needed to. I also wanted to use these for on salads.
This next process is called "blanching". Blanching basically softens the vegetables, then promptly stops the cooking process so they can be frozen more easily. It also traps in the flavors, color, and textures. It relies on critical timing however which I hope I did right! Otherwise, I'm in for some nasty vegetables! Blech! Here is an article I found that has proper blanching times for different vegetables: Blanching Times
Once chopped, I checked my pot of water to make sure it was boiling. By this time it was! I carefully placed half of the peppers in the pot (there were 9, so a lot of chunks!) I set the timer for 3 min.
While the peppers were boiling I filled a container (or you could use a bowl) full of the coldest water I could get out of my faucet which wasn't much. Cold water and hot water decide when they want to come out most days. I then dumped about five ice cubes in. When the 3 minutes was up I quickly took a spoon and scooped out the hot peppers into the cold water. I recommend using a drain spoon so you can get as much of the hot water out as you can. Otherwise, you just melt the ice cubes. This part was perplexing and took a few tries to get it timed just right. As soon as they were all in (within 20 seconds), I set the timer for another 3 minutes as I dumped the rest of the peppers into the boiling water again.
One thing I do recommend is not piling them up like this. You want to have them not touching as much as possible because now we are going to freeze them.
I ended up putting some of these aside in little ziplock baggies divided up specifically for meals and then freezing the rest individually in the freezer with this method. Again I set the timer, but this time for 2 hours. The point of this is freezing the pieces individually first before putting them in a bag. That way they won't stick together and when I'm ready to use them, I can take just what I need out. :) Once they were frozen, I poured them in a bag and labeled them with the date. Badaboom!
I ended up putting some of these aside in little ziplock baggies divided up specifically for meals and then freezing the rest individually in the freezer with this method. Again I set the timer, but this time for 2 hours. The point of this is freezing the pieces individually first before putting them in a bag. That way they won't stick together and when I'm ready to use them, I can take just what I need out. :) Once they were frozen, I poured them in a bag and labeled them with the date. Badaboom!
WARNING: A packed freezer is DANGEROUS!!! I don't know how many times frozen meats, bags of vegetables, bread, and whatnot came flying at me, the more I packed in there and every time I opened the door. A couple times they even fell on my foot! Yoooww! Next time I do this, I will plan better with more room!
I continued with the carrots and did the same thing. I did peel the carrots because they freeze better that way. I also chunked them but they could be sliced round too depending on what you want to use them for.
I cried my way through 4 brutal onions. I didn't use a piece of bread cause frankly I thought of it after I was finished, but I mentioned it here if you want to try the bread-in-mouth tear prevention.
I also diced some and made some bigger for like stir fry and similar dishes. I labeled the ziploc bags with a sharpie marker and portioned them out according to each meal use because once frozen they stick together and you want to use them all at once.
So that's pretty much it! If you have any questions, do ask in the comments or shoot me an email message! I'd love to hear your stories of trying this and maybe even learn more! Later I will share something I made with my freezable veggies!
Thank you for tuning into Cooking Up Experiments! Till next time!
 |
| Dunno what this face is ha. |
With love and compassion,


REBEKAH JOSANN


Comments
Post a Comment